Let’s be honest: While there’s plenty of BDSM equipment out there, a homemade piece is much more personal than off-the-shelf toys. And it’s usually more affordable too. Guest author Katharina-Sophie will show you in this tutorial how to make your own unique DIY flogger. All you need is some parachute cord from the hardware store and about two and a half hours of time.
This DIY tutorial first appeared on Katharina-Sophie’s currently paused blog and was made available to Deviance.
I was inspired by a Swiss site about paracord, whose video I’ll link to you under the decorative knots. As with cooking and baking, I modified the “recipe” a little and adapted it to my preferences (I don’t like small, thin floggers).
The material for the DIY flogger
- Paracord (how much depends on what you plan to do plus approx. 2 m for the handle and approx. 1.5 m each for the decorative knots)
- a ring (for example metal, approx. 4-5 cm in diameter)
- a rod to strengthen the handle (optional)
- Insulating tape (for taping the handle, optional)
- a thin string
The right tool
- Scissors/knife
- Lighter
- Paracord tool (optional)
- A roll of paper (toilet paper)
- Eight nails (approx. 5-7 cm)
- A pen
- Patience

First ask yourself the following questions: How long should your flogger be (tail including handle)? And: How many tails should your flogger have?
You’ve thought it over? Let’s get started!
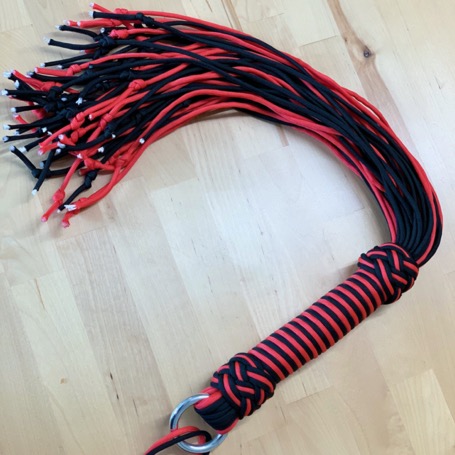
For example, if you want the flogger to have 50 tails and be 75 cm long including the handle, then cut 25 cords of 1.55 m each. The number of cords is half the number of tails and the length of the individual cords is determined by the Length that your flogger should have times two plus approx. 5 cm of waste.
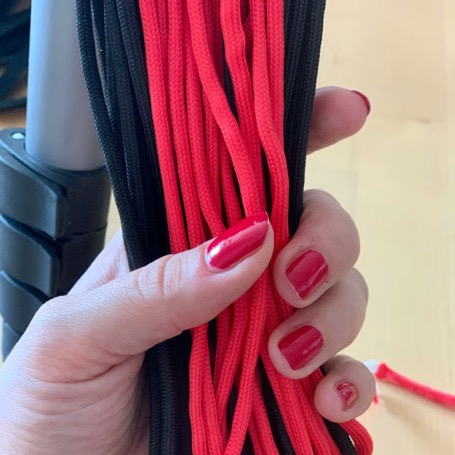
Here you can be completely creative and mix all the colors you want. For this tutorial I mixed black and red in a ratio of 2/3 – 1/3.
Pull these (25 in my example) cords through the ring so that you now have a ring with 50 tails of the same length.
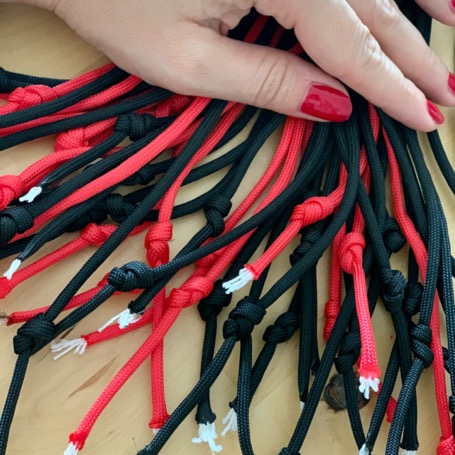
At this point you can put throwing knots (overhand knots) or something similar in the ends of the tails at the same height so that the paracord doesn’t completely fray and becomes nice and soft on the other side. However, you can also leave this step to the end.
(Optional) Now you can place the handle reinforcement (wood or metal bar of the desired thickness) on the ring in such a way that it is framed by all the tails and the handle reinforcement is no longer visible. Everything is then tied with a thin string so that everything holds together.
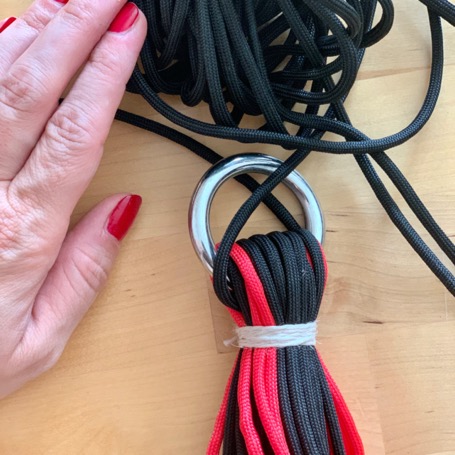
If you want to work without reinforced handles, simply tie the paracord cords tightly together underneath the ring so that they no longer move.
Now wrap the insulating tape around the handpiece until you have reached the end of the handle reinforcement – or, if you are working without handle reinforcement – as long as your handle should be.
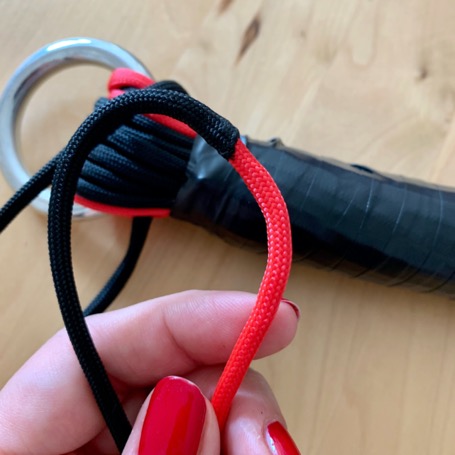
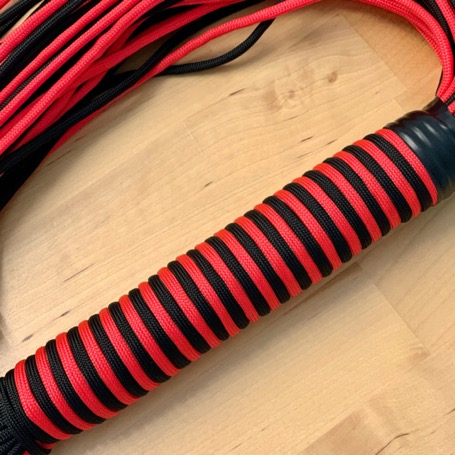
Now the handle is embellished and wrapped. You can do this in one color or two colors. If you do it in one color, all you have to do is pull a paracord through between the beginning of the insulating tape and the ring and then wrap it around twice (approx. 2 m. Depending on the length of the handle, this can be more or less. The best way to test it is by wrapping it around once as a test).
If you do the whole thing in two colors, you take the two colors, connect these paracord straps (cut out the white inside of both straps, then push one color into the other and connect the two straps together with a lighter). You then place the connection point so that it is no longer visible, i.e. exactly under the ring, and then wrap it in two rows down to the bottom.
Once you have reached the bottom of the handle, there are two options: you can cut off the ends, burn them with the lighter and fix the whole thing in place, or you can, as I do, gain two additional tails by attaching the end pieces with the insulating tape stick it in place once and cut the tails to the length of the other tails. So you have two more tails.
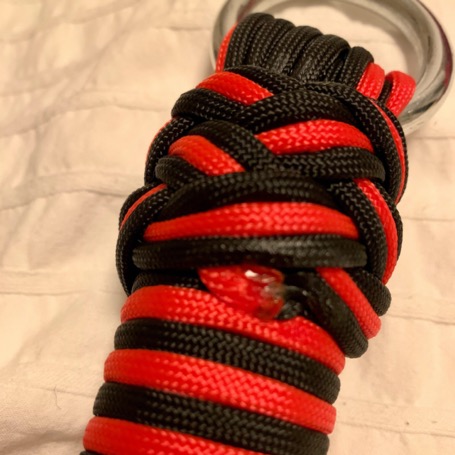
Now all that’s missing are the artistic decorative knots. You can tie these knots over your hand or using a toilet paper roll in which you make a total of eight holes. I would like to link the video of my Swiss colleague, who explains it perfectly.
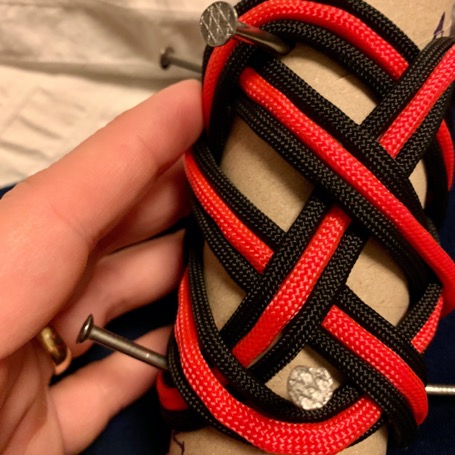
It is important that this artificial knot theoretically only consists of one rope. If you only want to do it in one color, you can simply follow the path described in the video three times in a row. If you want to make it in two colors, like I did, you “walk” the path twice with the same color and again with the third color, making sure that the third color is always in the middle between the other two, paths that have already been completed.
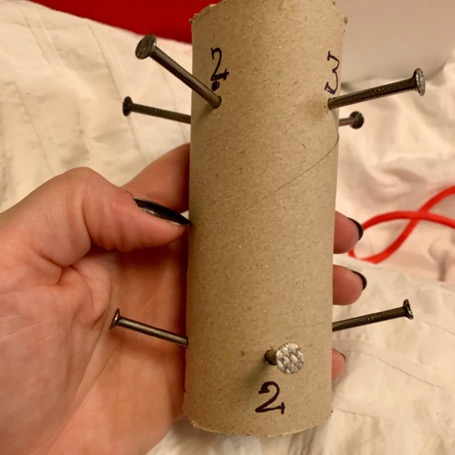
In addition to the colleague’s nice video, I would like to say that I always create the decorative knots on this roll, then pull the nails out of the toilet paper roll and push the knot into the correct position on the flogger.
You then have to tighten these decorative knots with a lot of patience, one after the other from the beginning, just as you knotted them. Pull firmly over and over again until they are completely tight and no longer move. To do this, you can use a special tool or simply use a nail to pull the paracord cords even tighter.
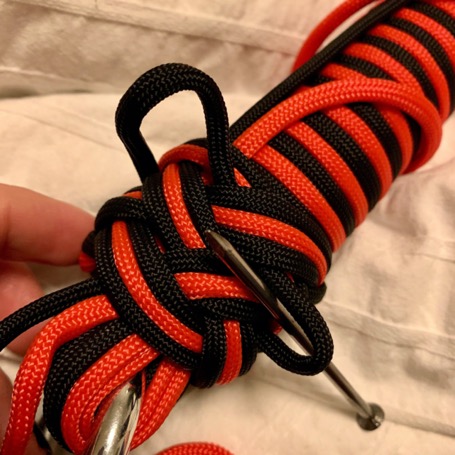
The ends are then cut off, torched with a lighter and tied securely to the knot. If you want to win two more tails and you have made the decorative knot in two colors, you can simply leave the tails hanging on the lower decorative knot and cut them off at the same height as the other tails. If the knot is completely tight, this is not a problem.
By now you should make the throwing knots or the overhand knots (these should be at the same height) then cut off the tails nicely so that they are also at the same length and you have your homemade flogger.
I hope you can now craft your own flogger for your sessions and/or give your Sub or Dom a very personal gift.
Interested in more kinky DIY projects? Then check out our nine repurposed hardware store items here.